
In my last post, I covered how to deploy and configure VIDM. In this post, I would like to cover how to add an AD directory to VIDM. Read on to learn more!
![]()
Under the Identity & Access Management tab you will see the option to add a directory:

Under this button you will see a variety of options. In the case of Log Insight, only Active Directory is supported.
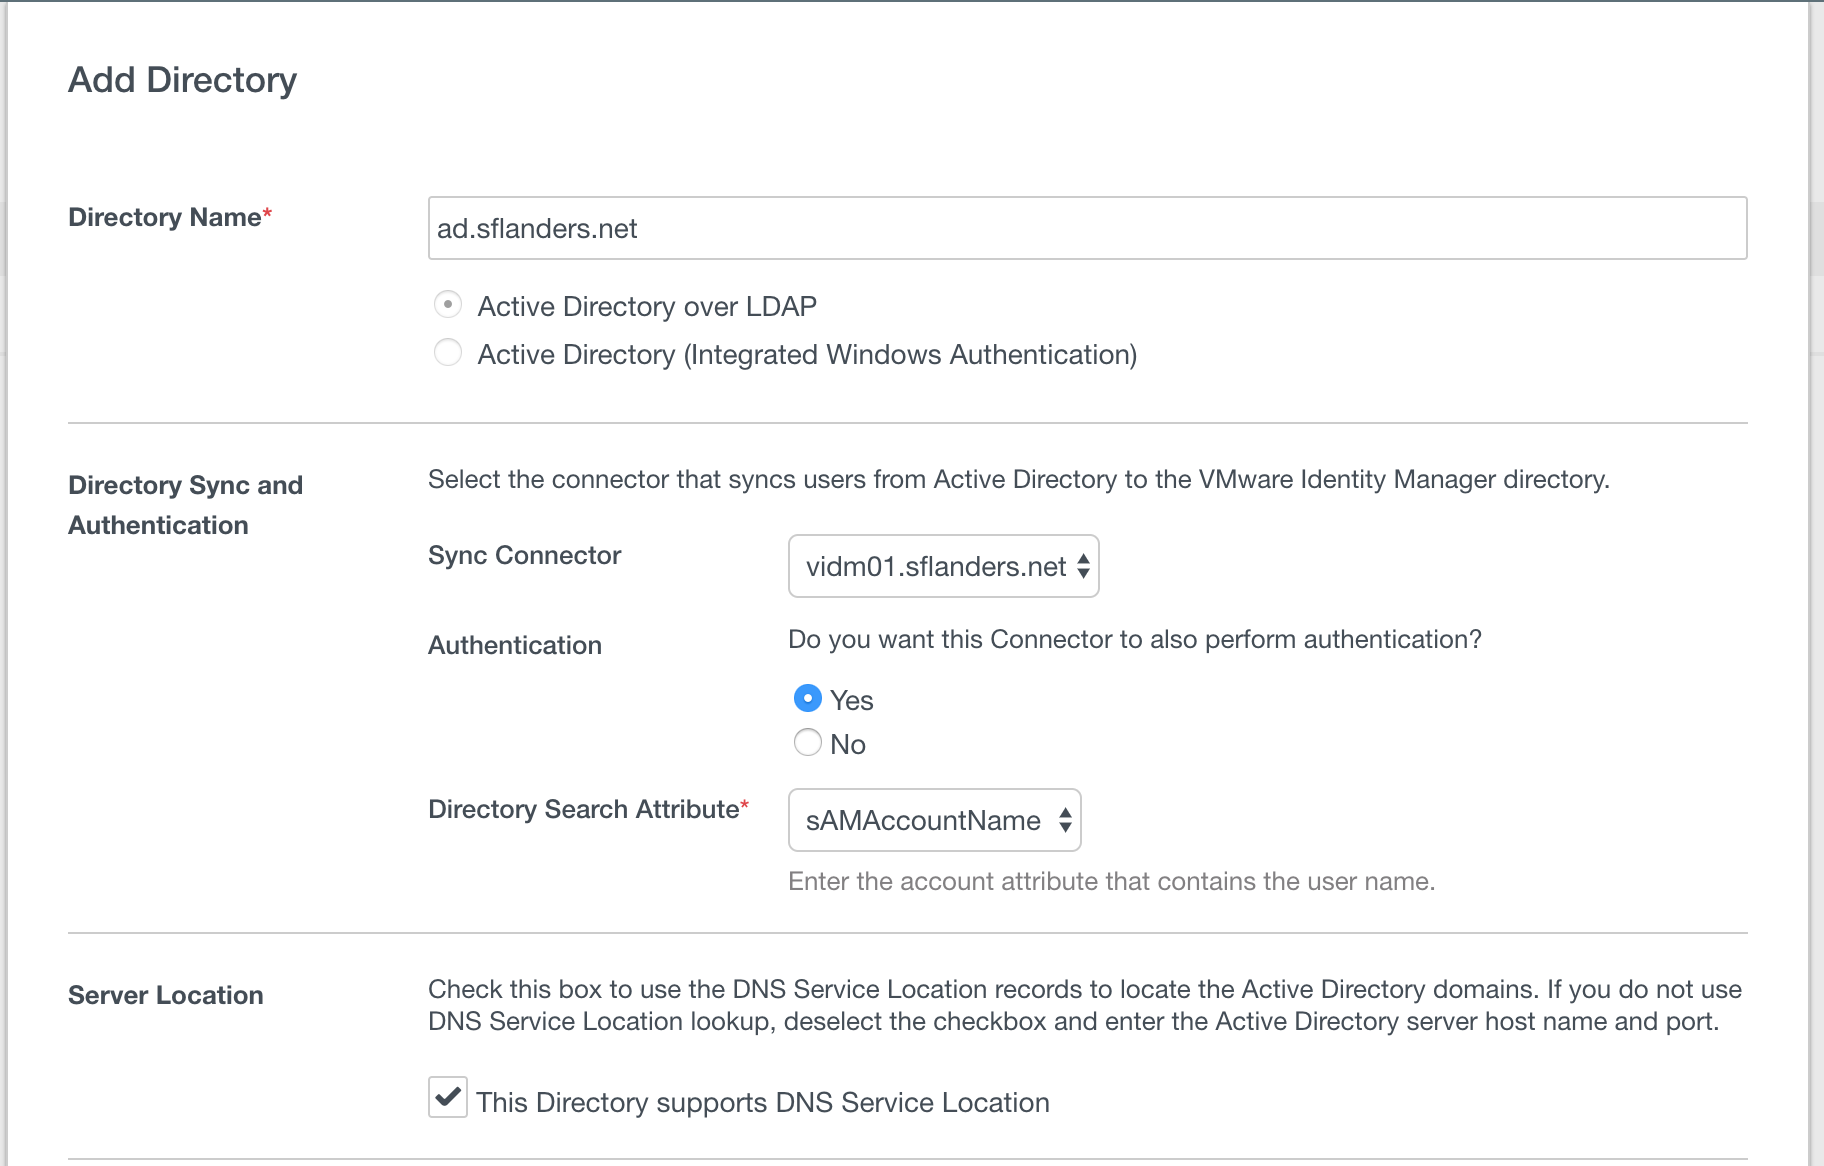
For Active Directory a variety of options are required. In general, you will want the Active Directory (Integrated Windows Authentication) radio button. The directory name is just used to identity the directory you are adding — I use the same name as the domain I am joining. The sync connector would be the VIDM instance you want to connect to. The directory search attribute only needs to be changed if you know something other than the sAMAccountName is used in your environment.
If you wish to connect to AD over TLS you must enter the SSL certificate. In general, the bind user details I used will work for most environments (changing the dc= to match your domain). Be sure to test the connection to ensure it is working properly.
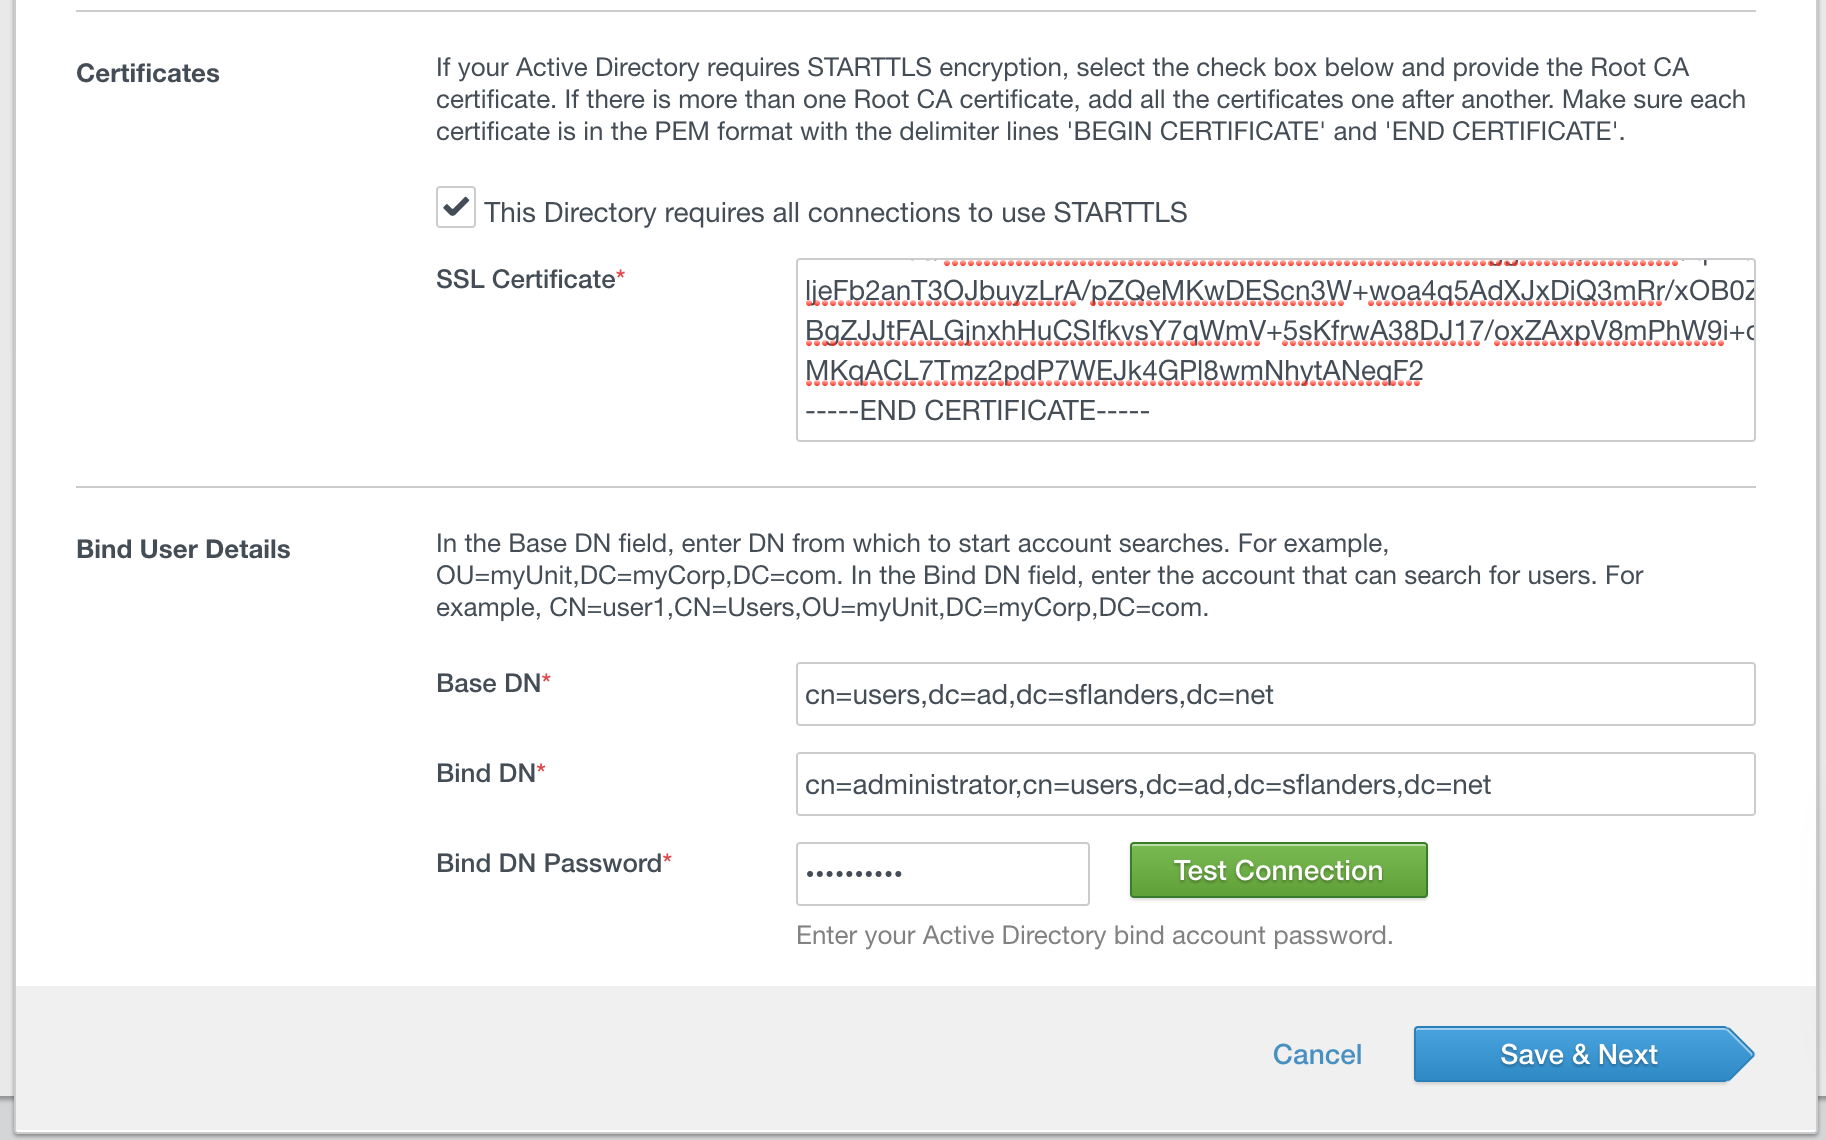
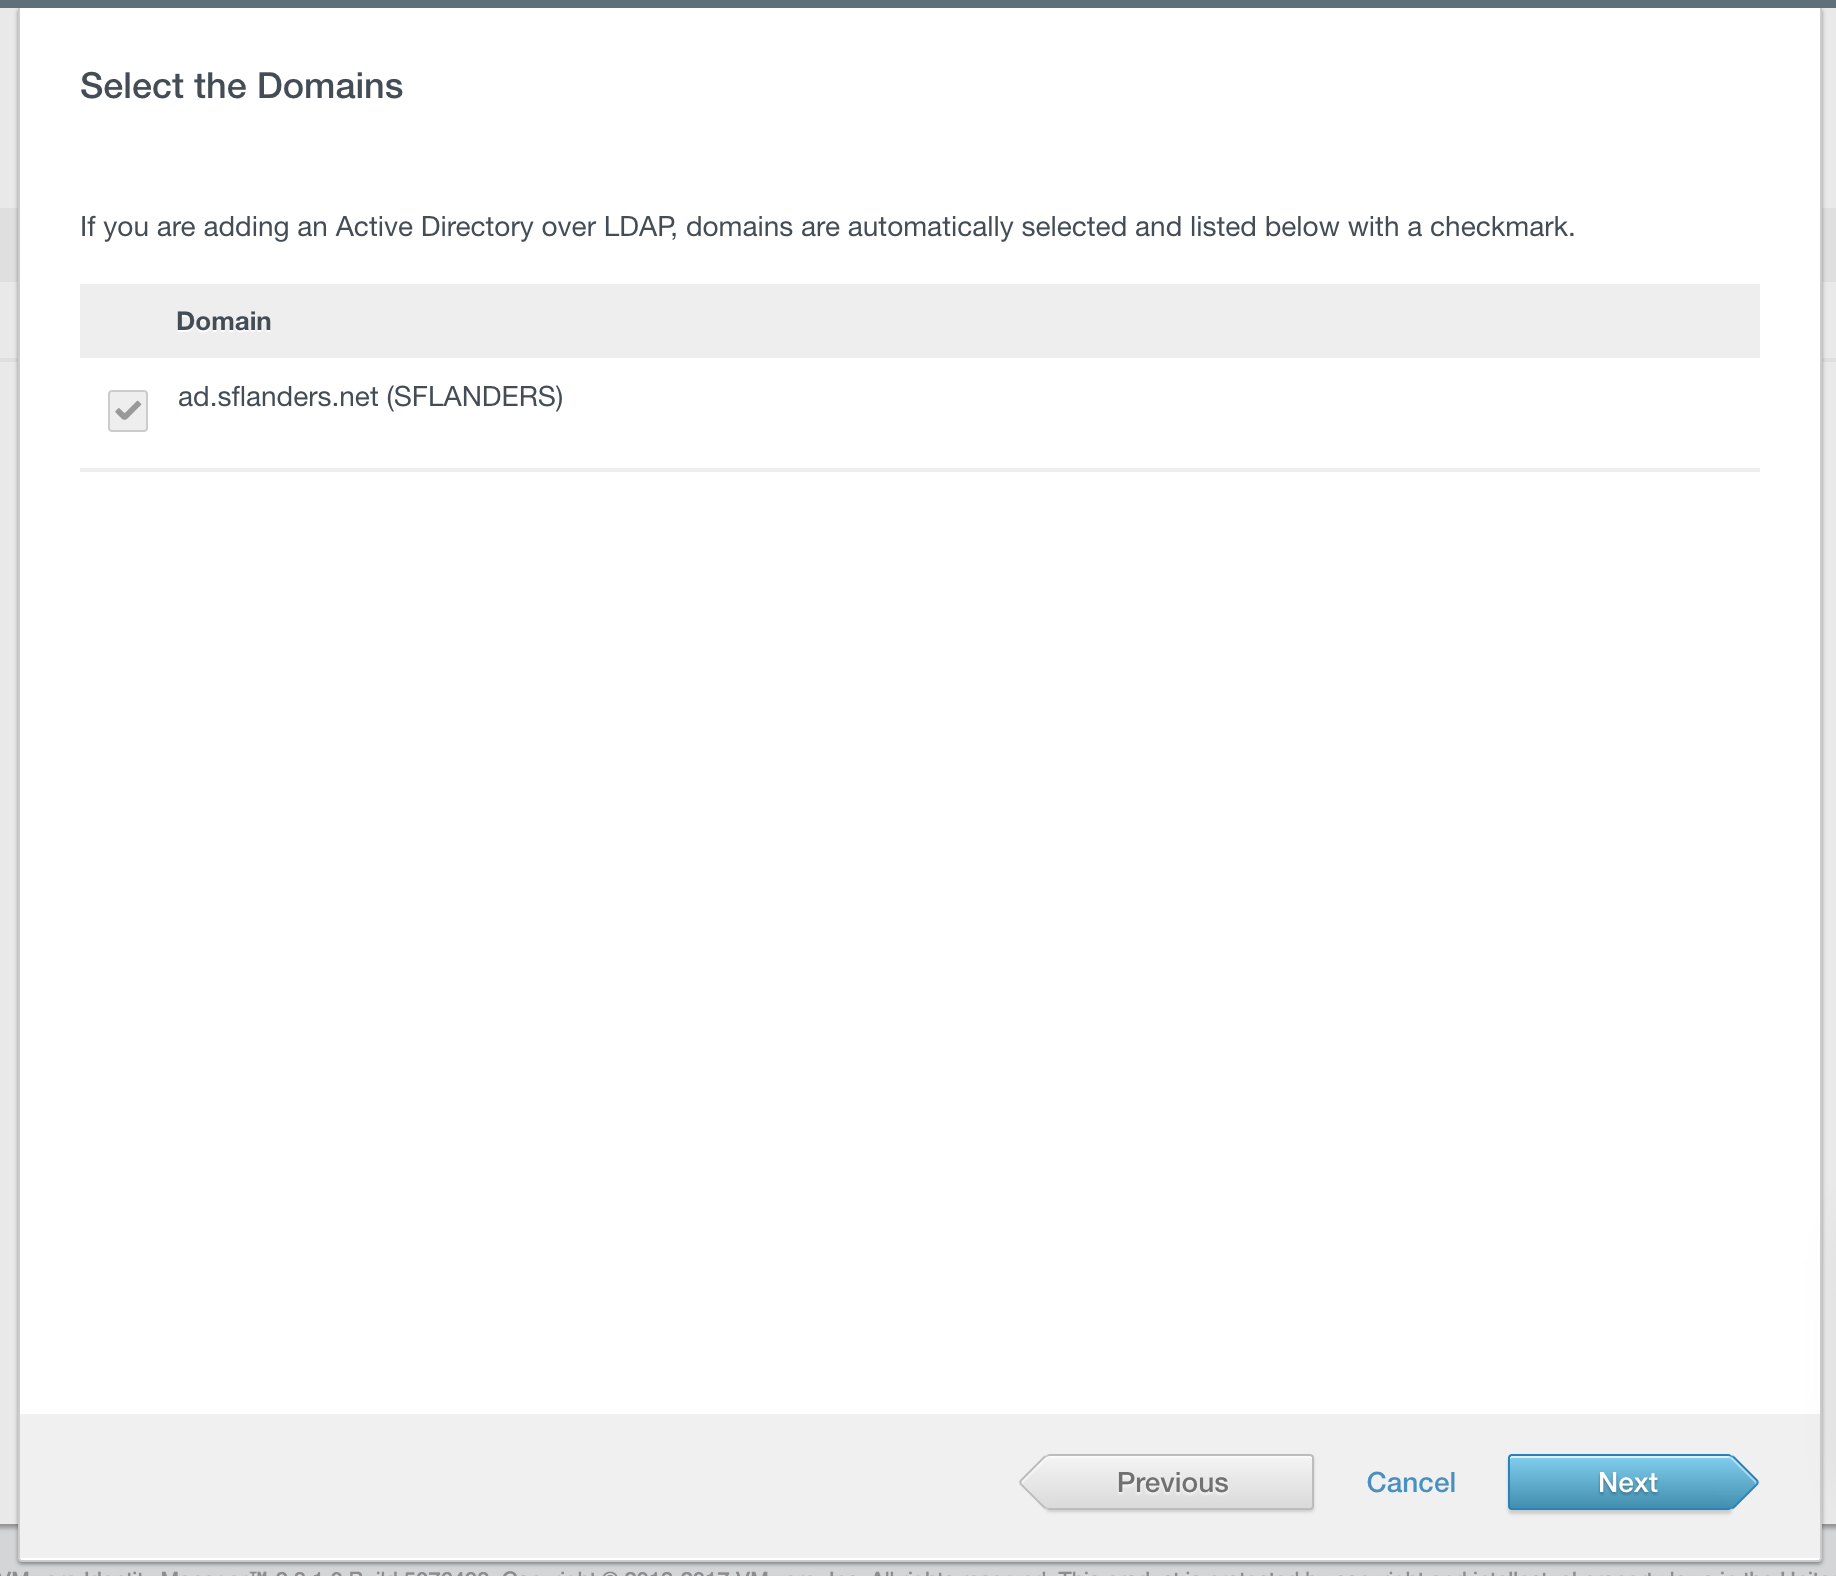
Assuming the test connection is successful, you can select Save & Next. Then, you need to select the domains you was to connect to.
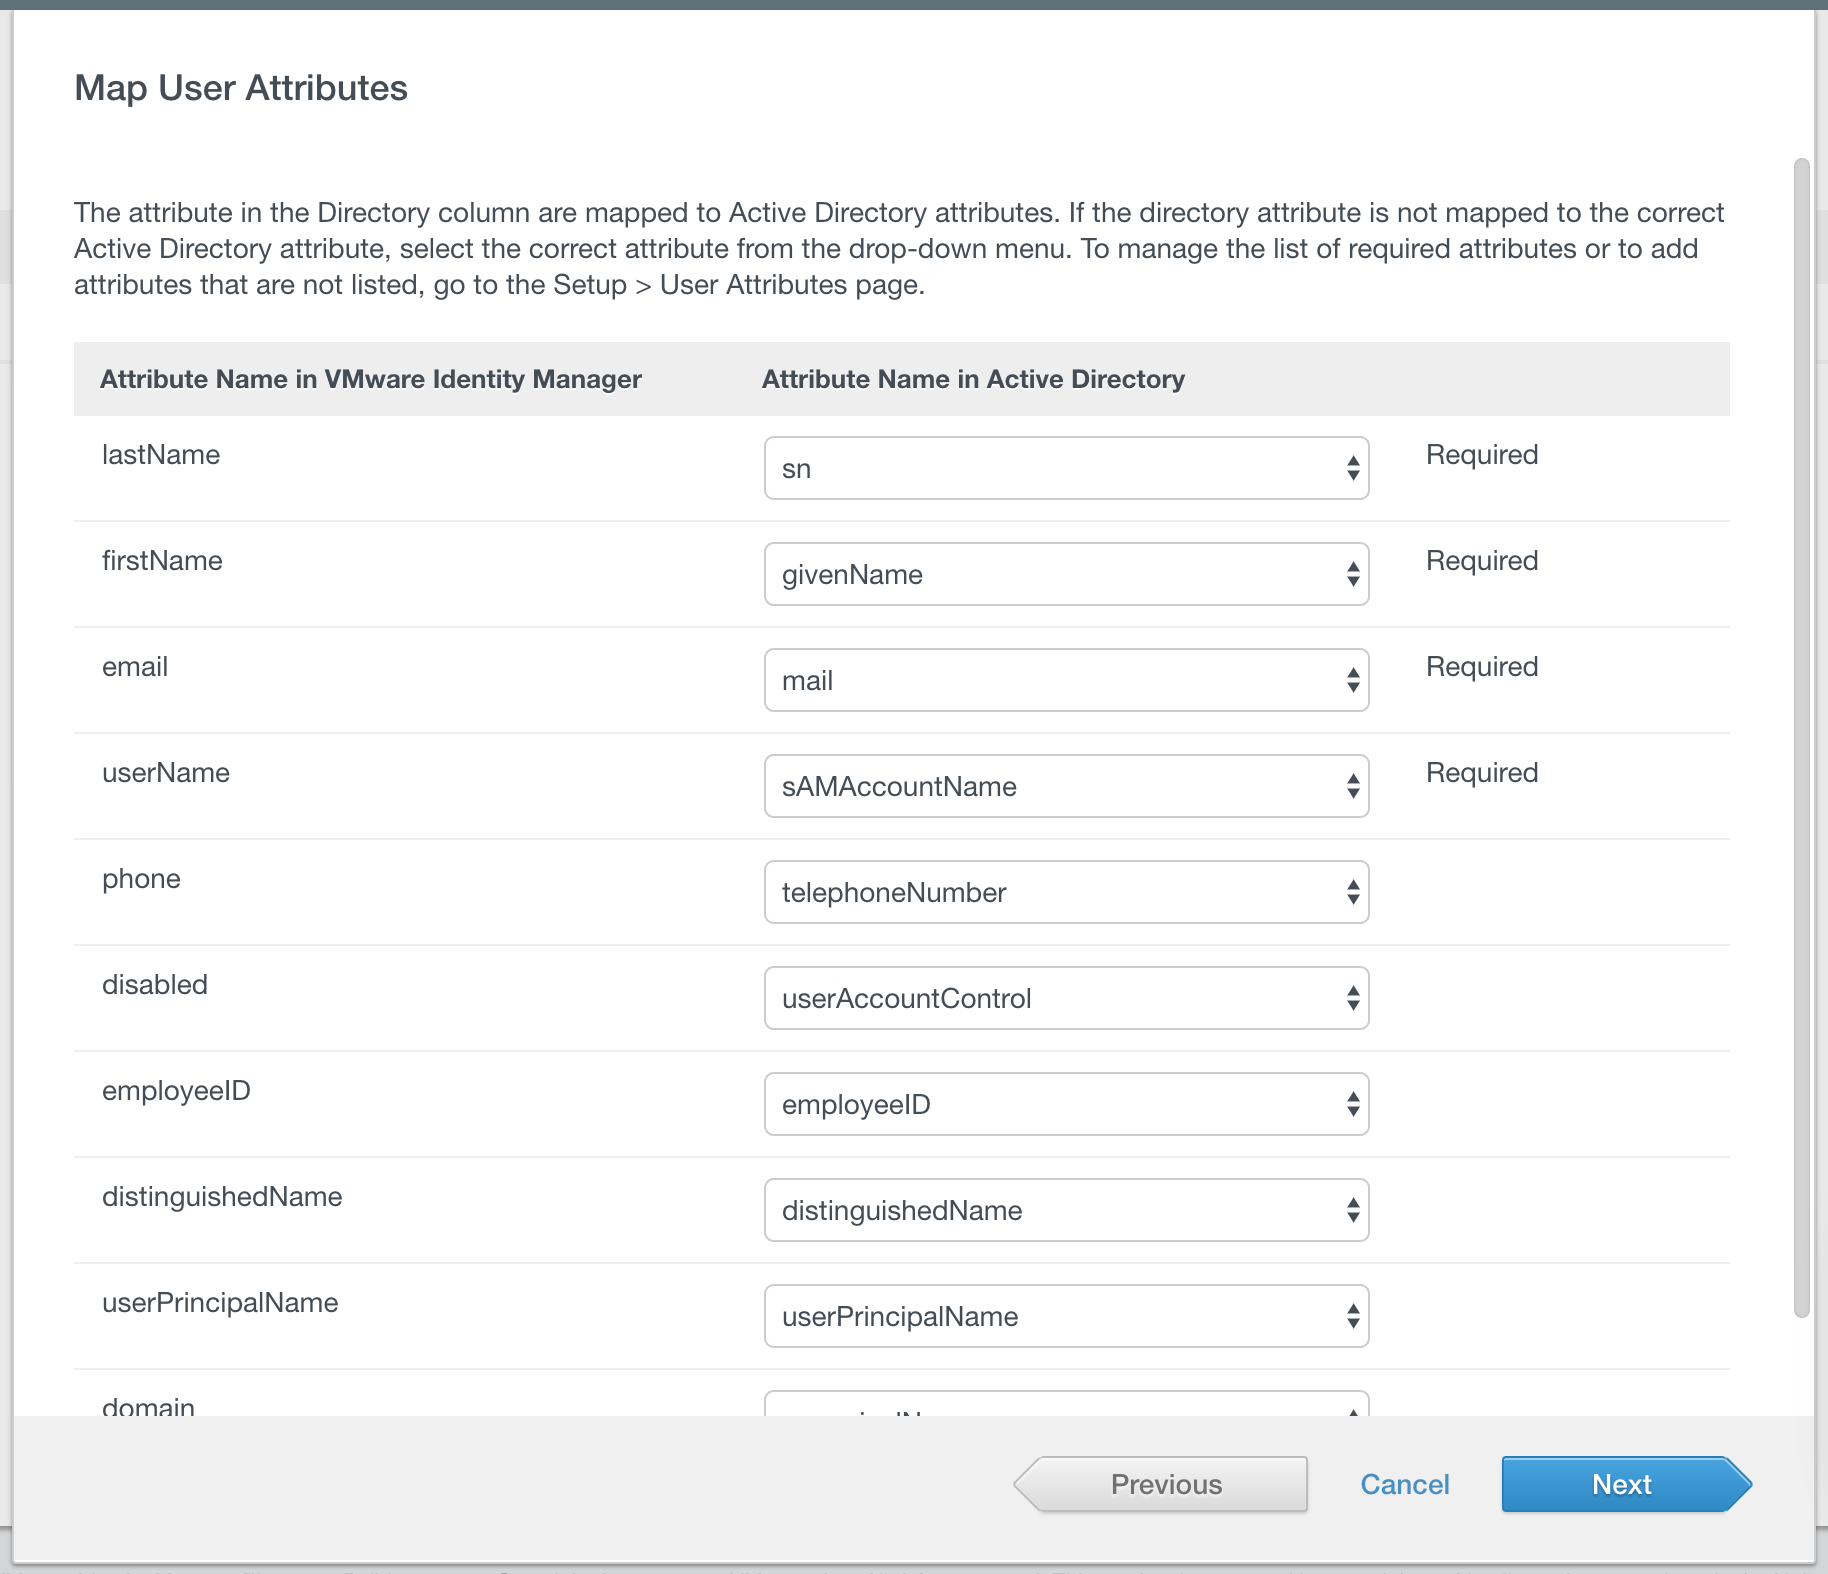
Then you need to map user attributes. In most case, you should be able to take the default settings. Note, in addition to the mappings you MUST ensure any user you wish to add has a minimum of the required attributes listed (lastName, firstName, email, and userName).
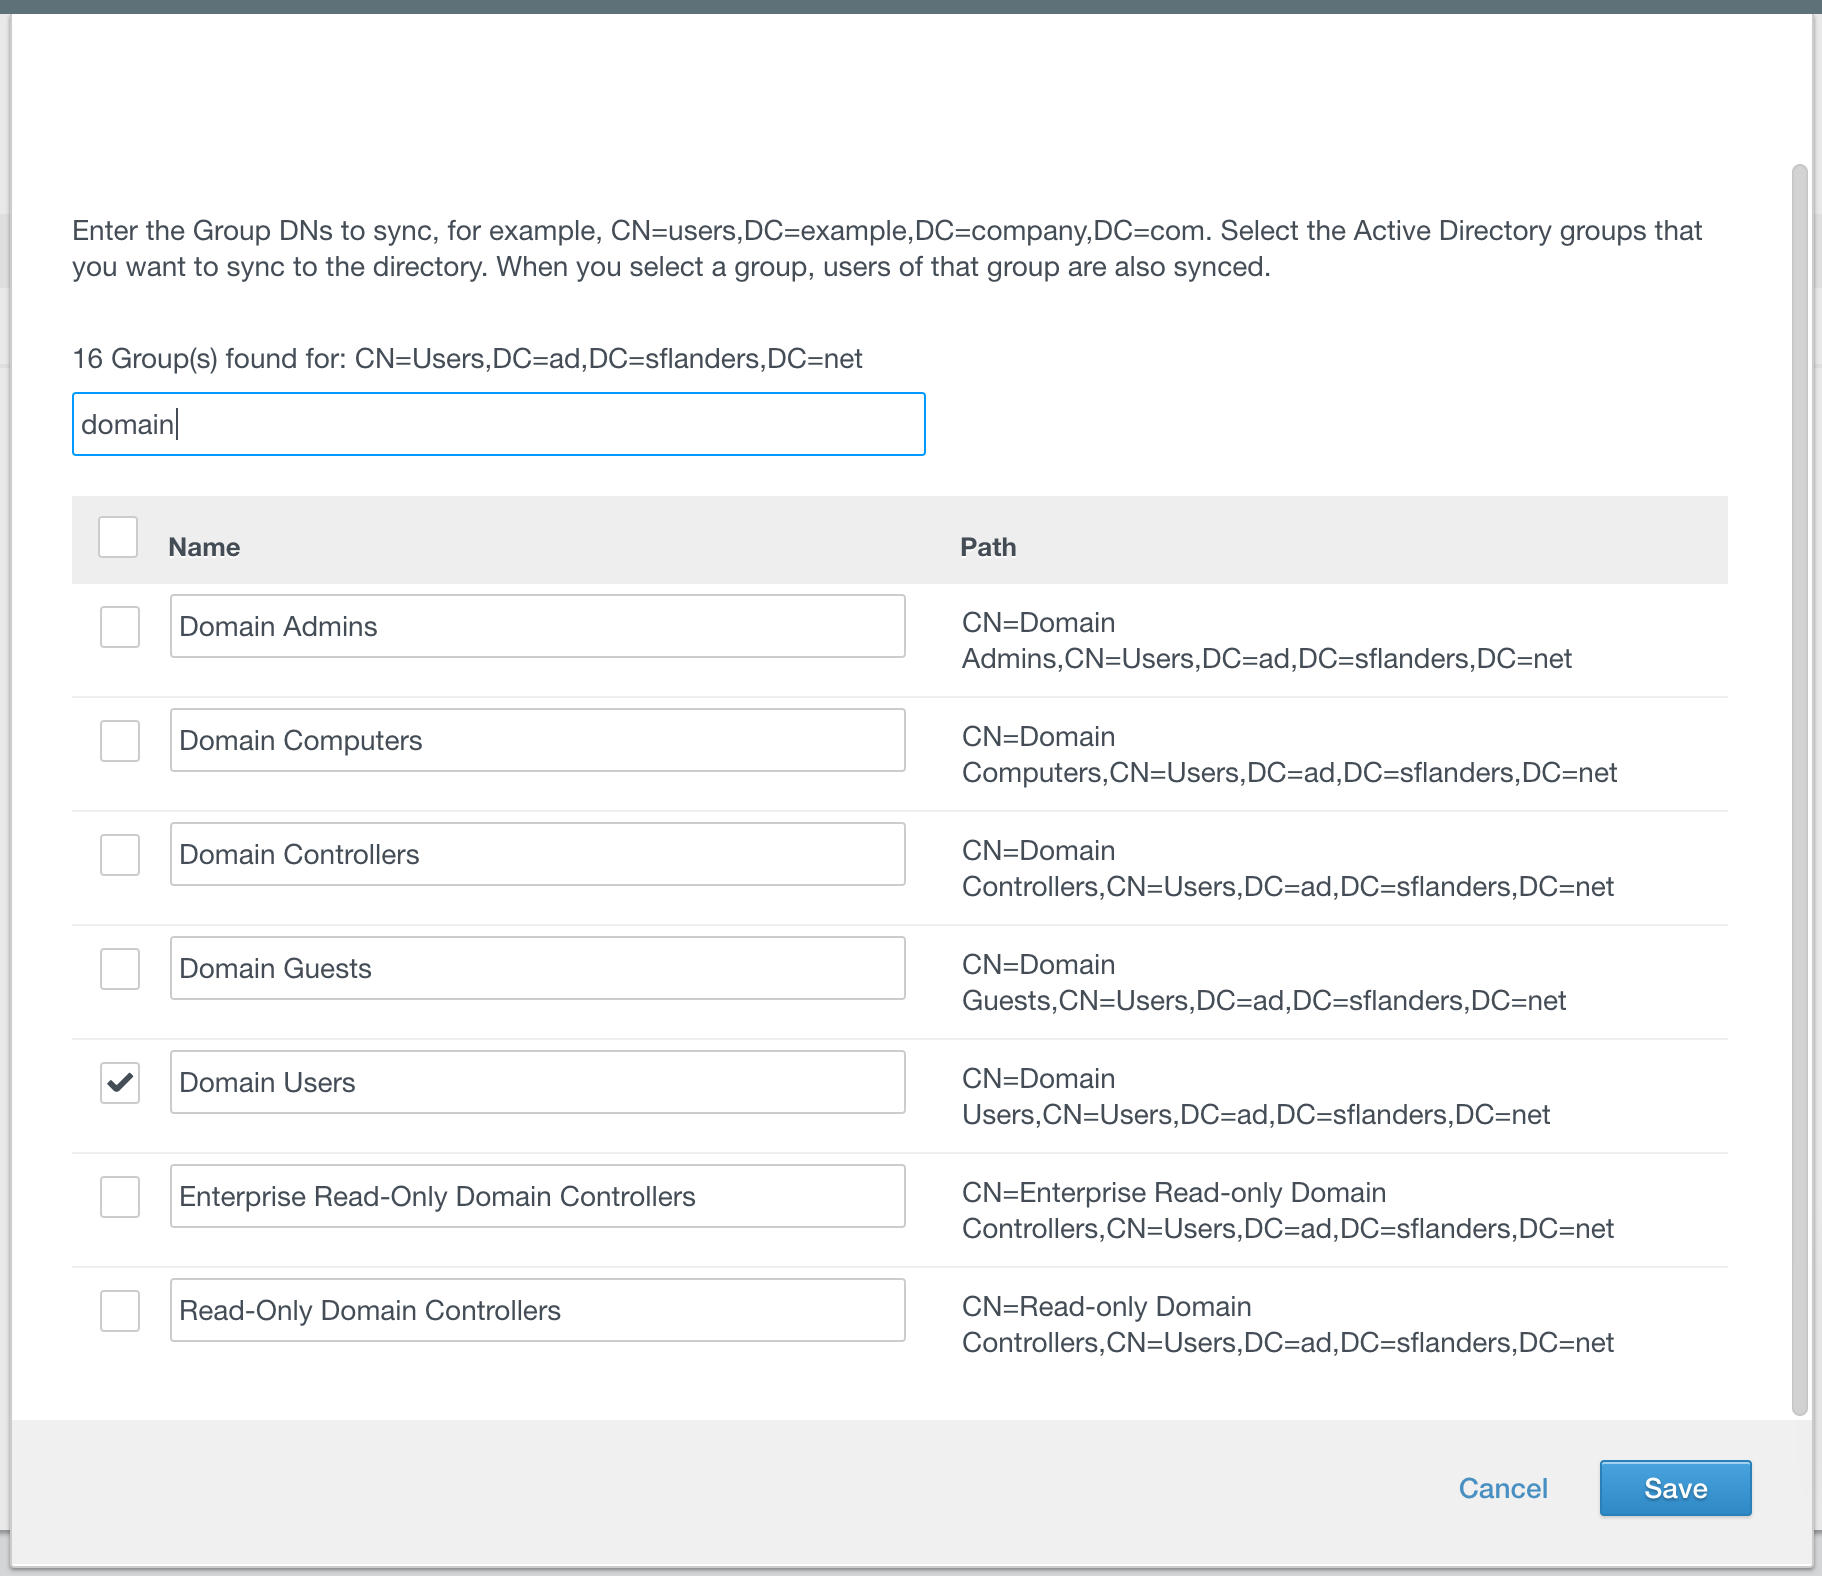
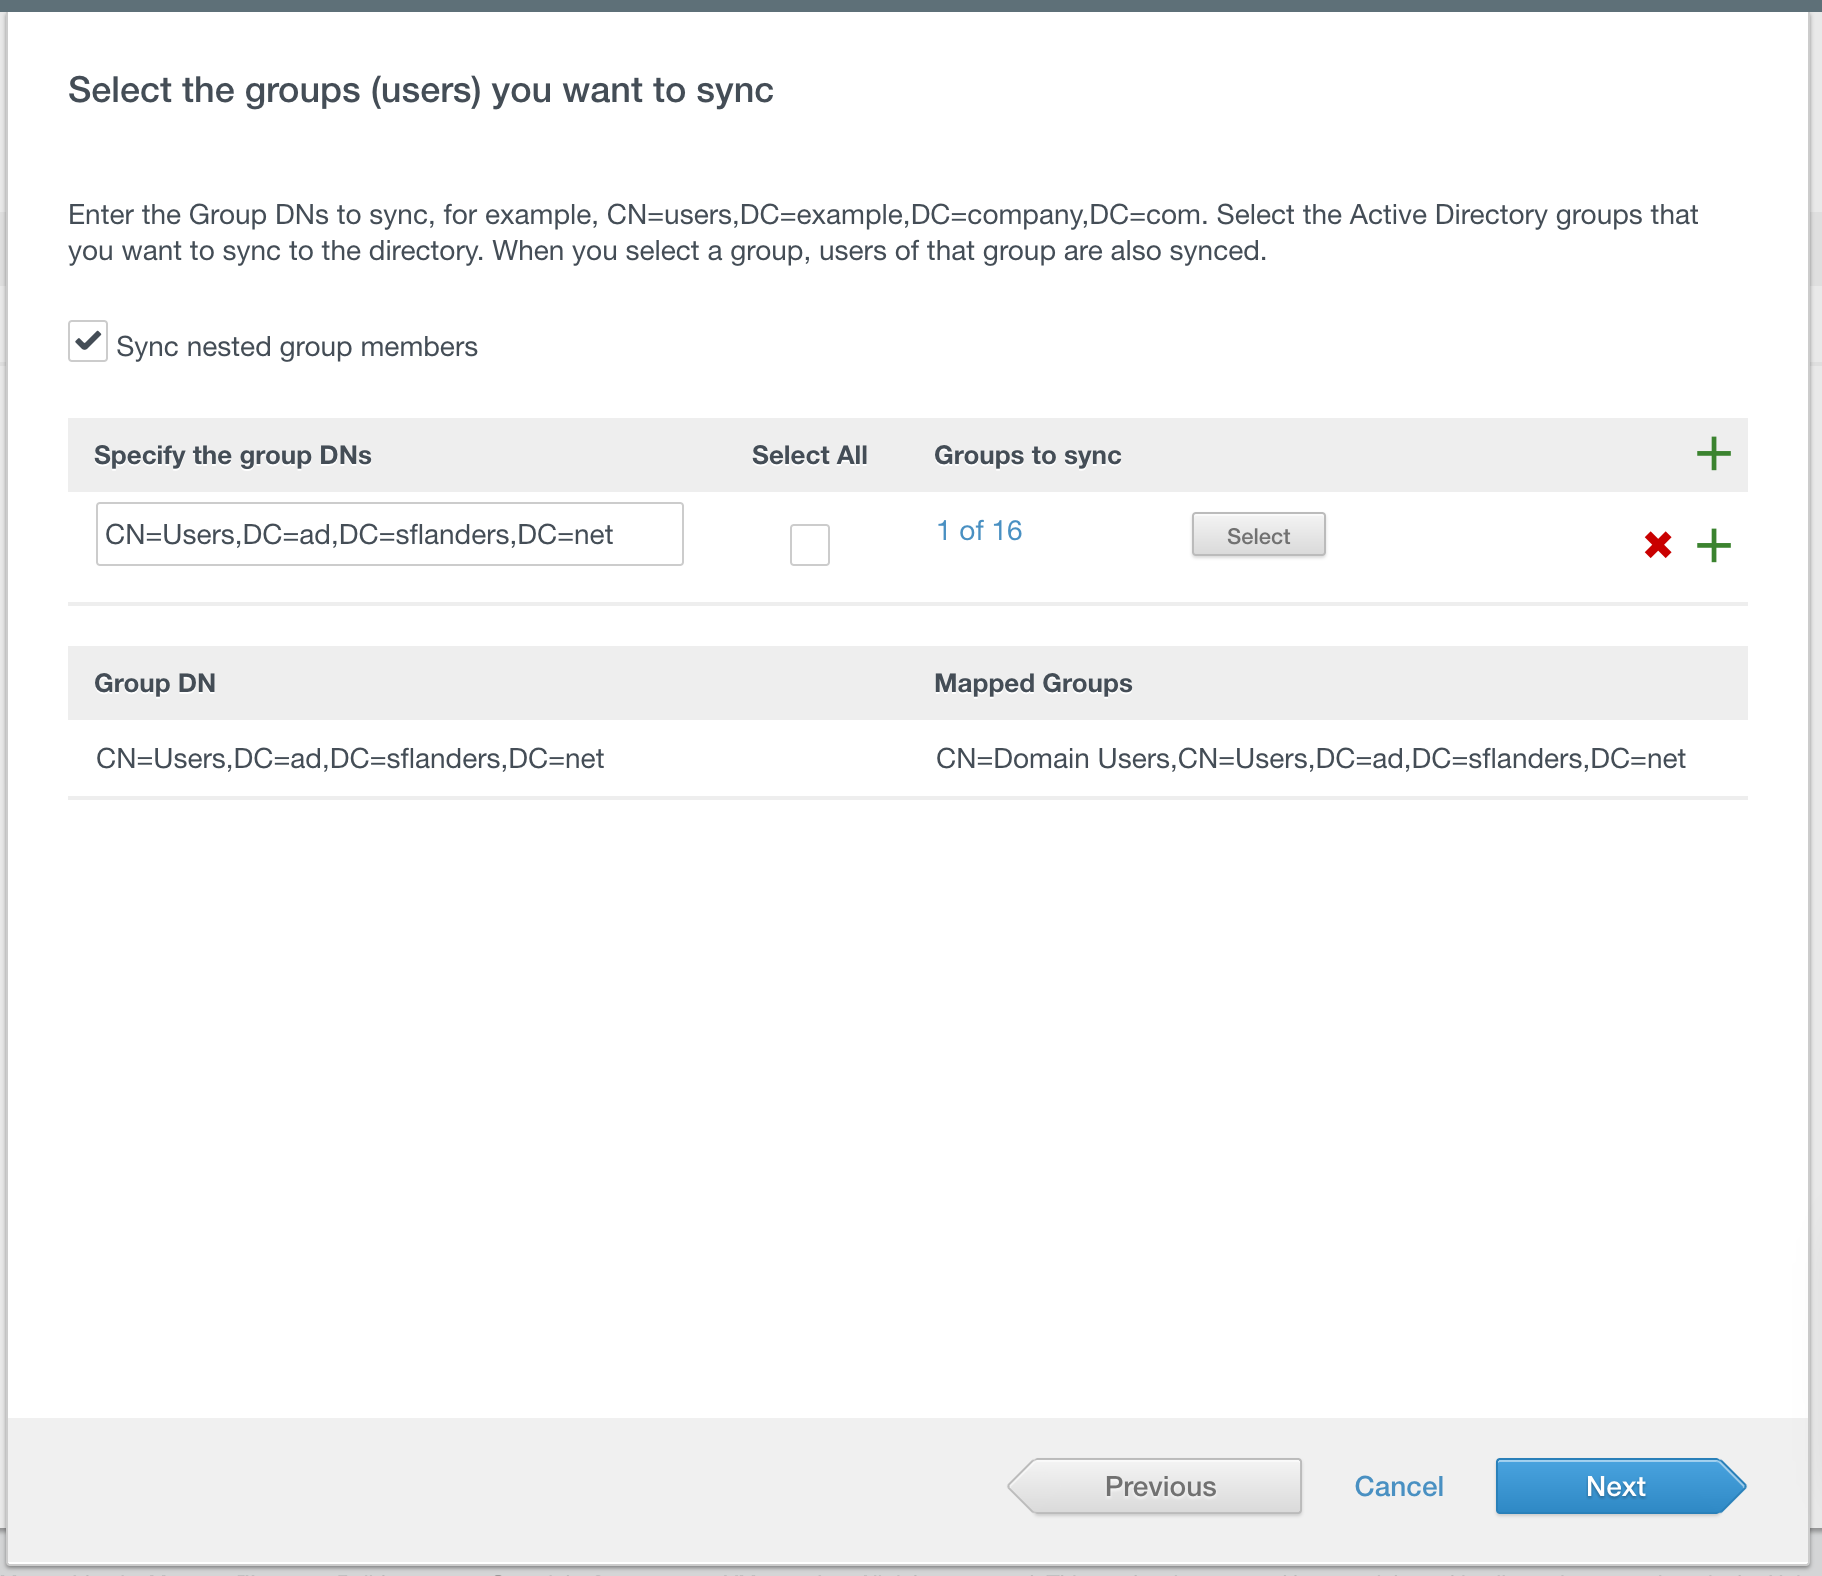
Then you need to specify which groups to sync. Once you specify the DN, you can select the group(s) you wish to sync by clicking the Select button.
IMPORTANT: You should make the DN as specific as possible. For large domains, a DN which returns a lot of results may slow down VIDM.

Check the group(s) you wish to sync.
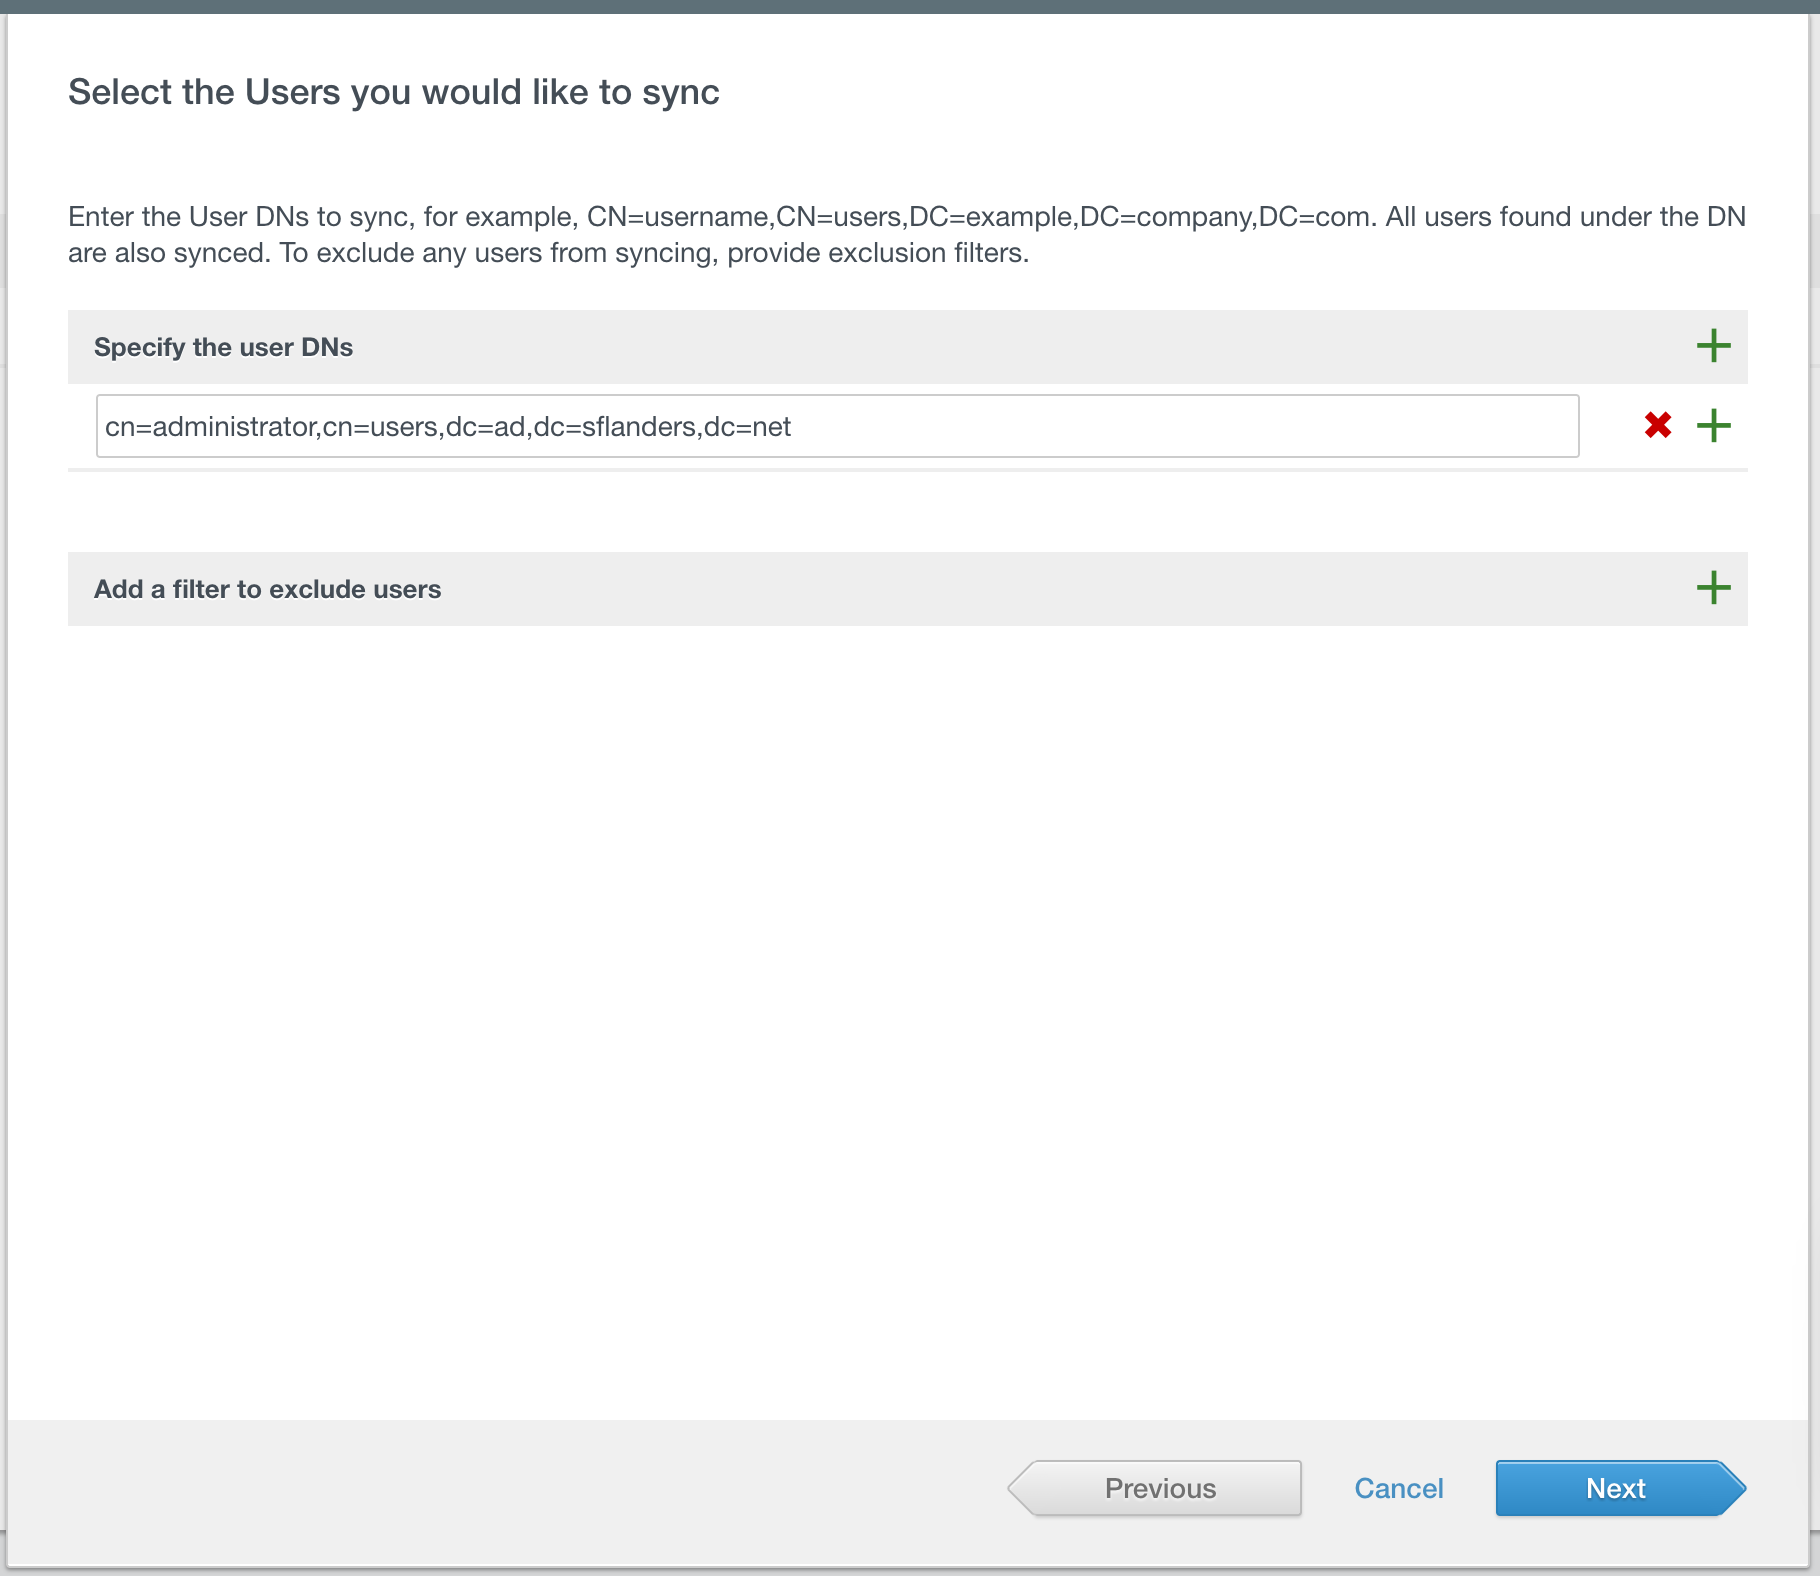
Repeat this exercise for users.
IMPORTANT: You should make the DN as specific as possible. For large domains, a DN which returns a lot of results may slow down VIDM.
Again, select the users you want and exclude as necessary.
When you are done you can review your inputs. If there are any errors or warnings this will also be listed on the page. Do not ignore the errors (things in red) as any error will result in something not working.
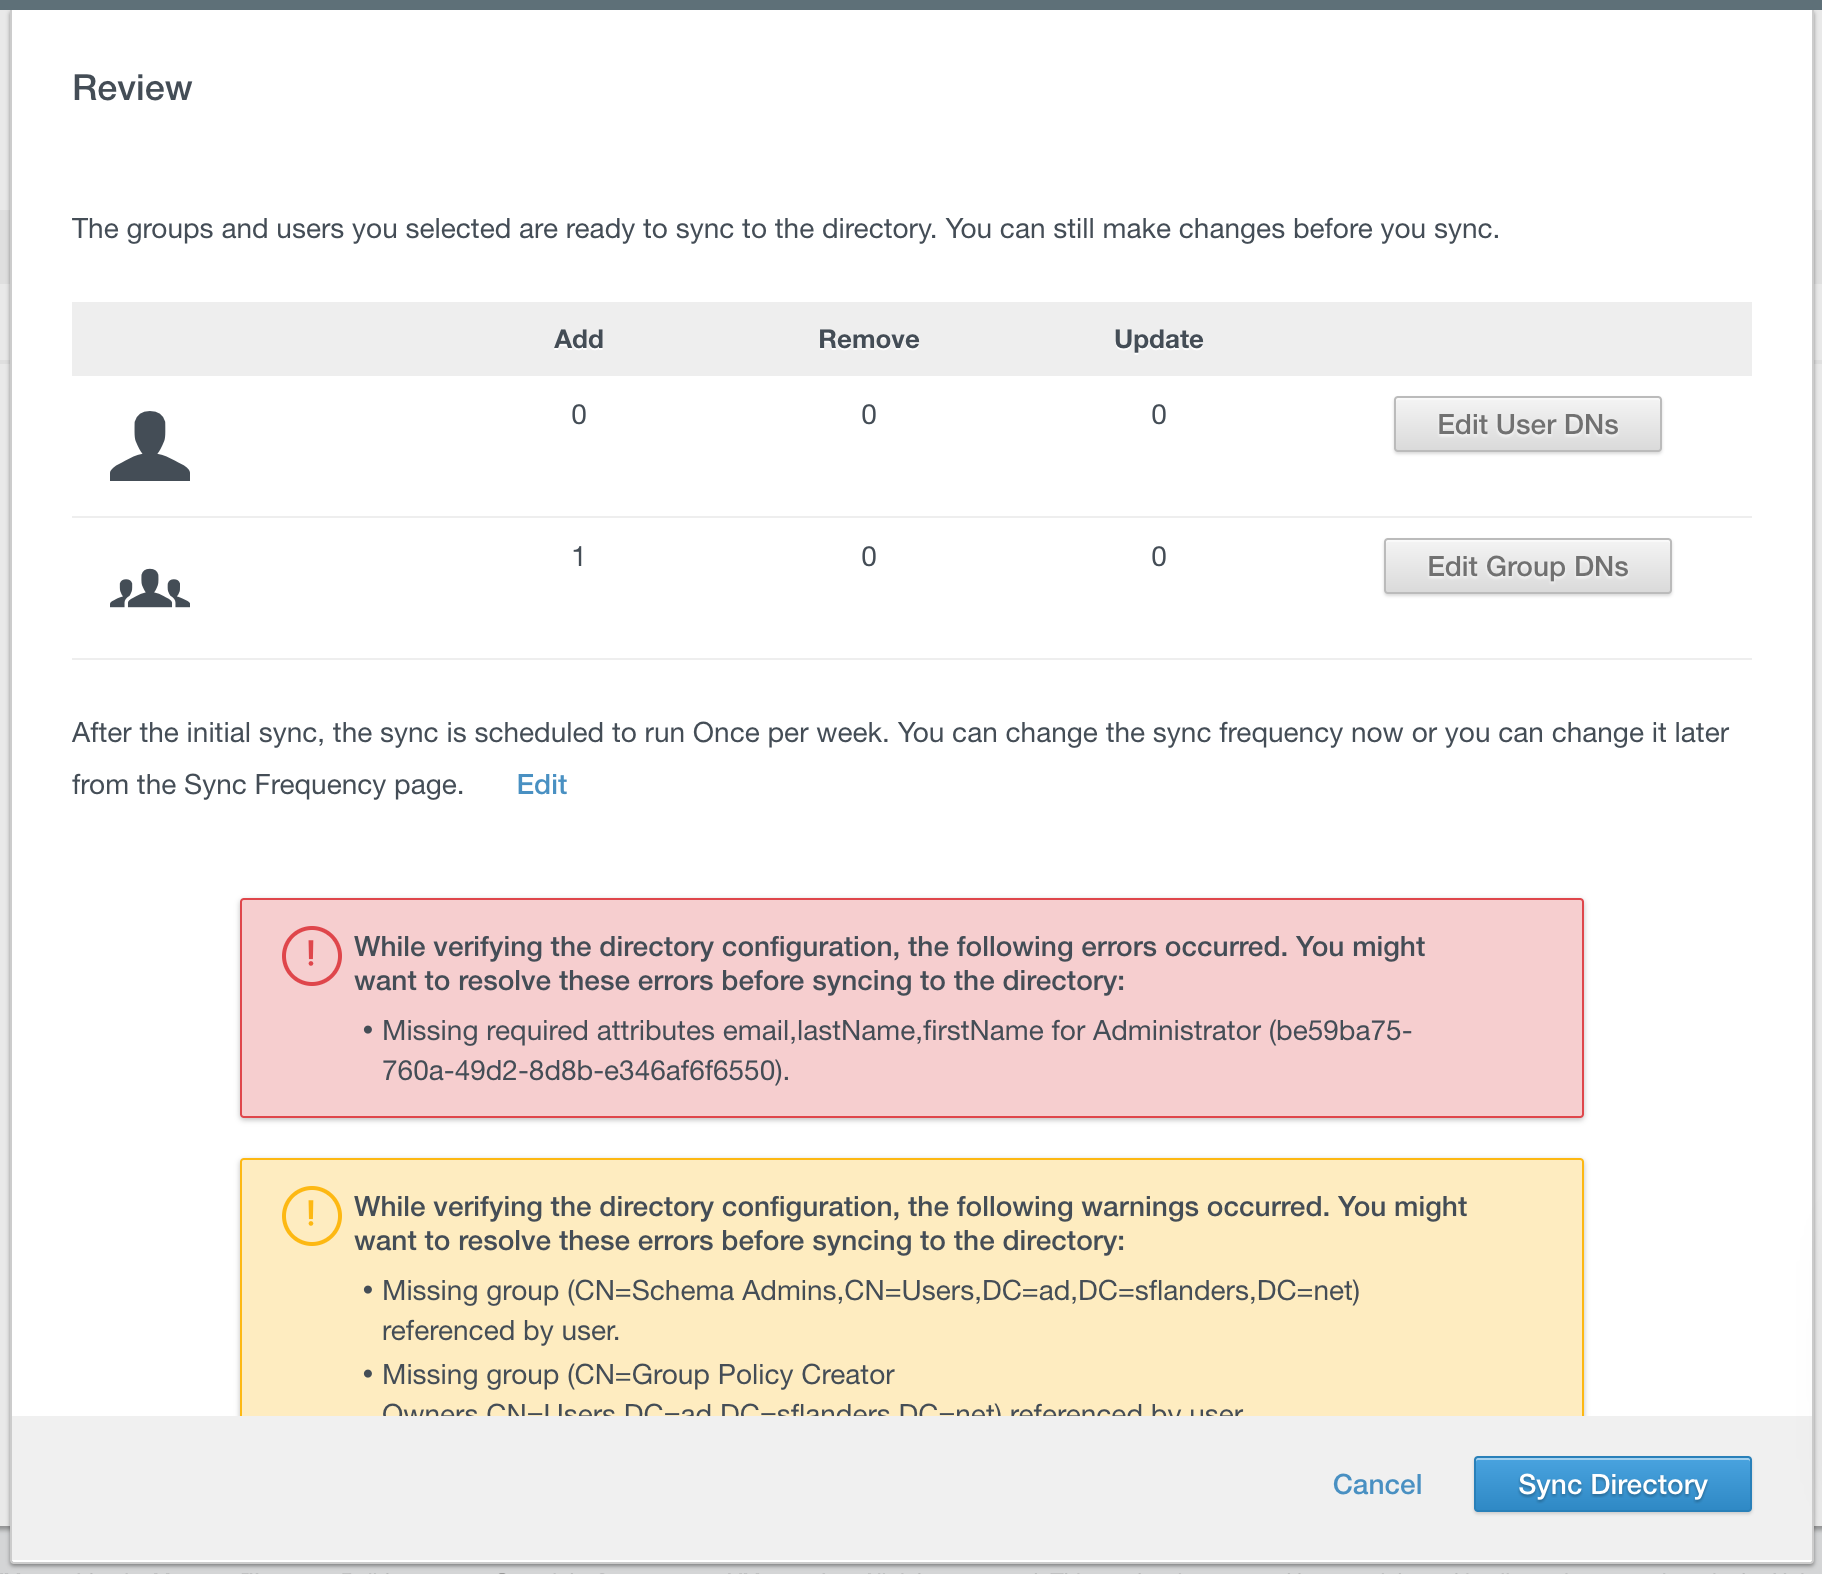
When you are happy with the configuration you can then sync the directory.

The sync operation is a task that runs in the background and can take a long time to complete depending on how large your directory is, how many users/groups you decided to sync, and most importantly how specific the DNs you entered were.

When the sync is done, you can see how many users were synced. If you see 0 this is a good indication something did not work. If you see any alerts (“Ale…”) then you should select the hyperlink to see what problems were reported.
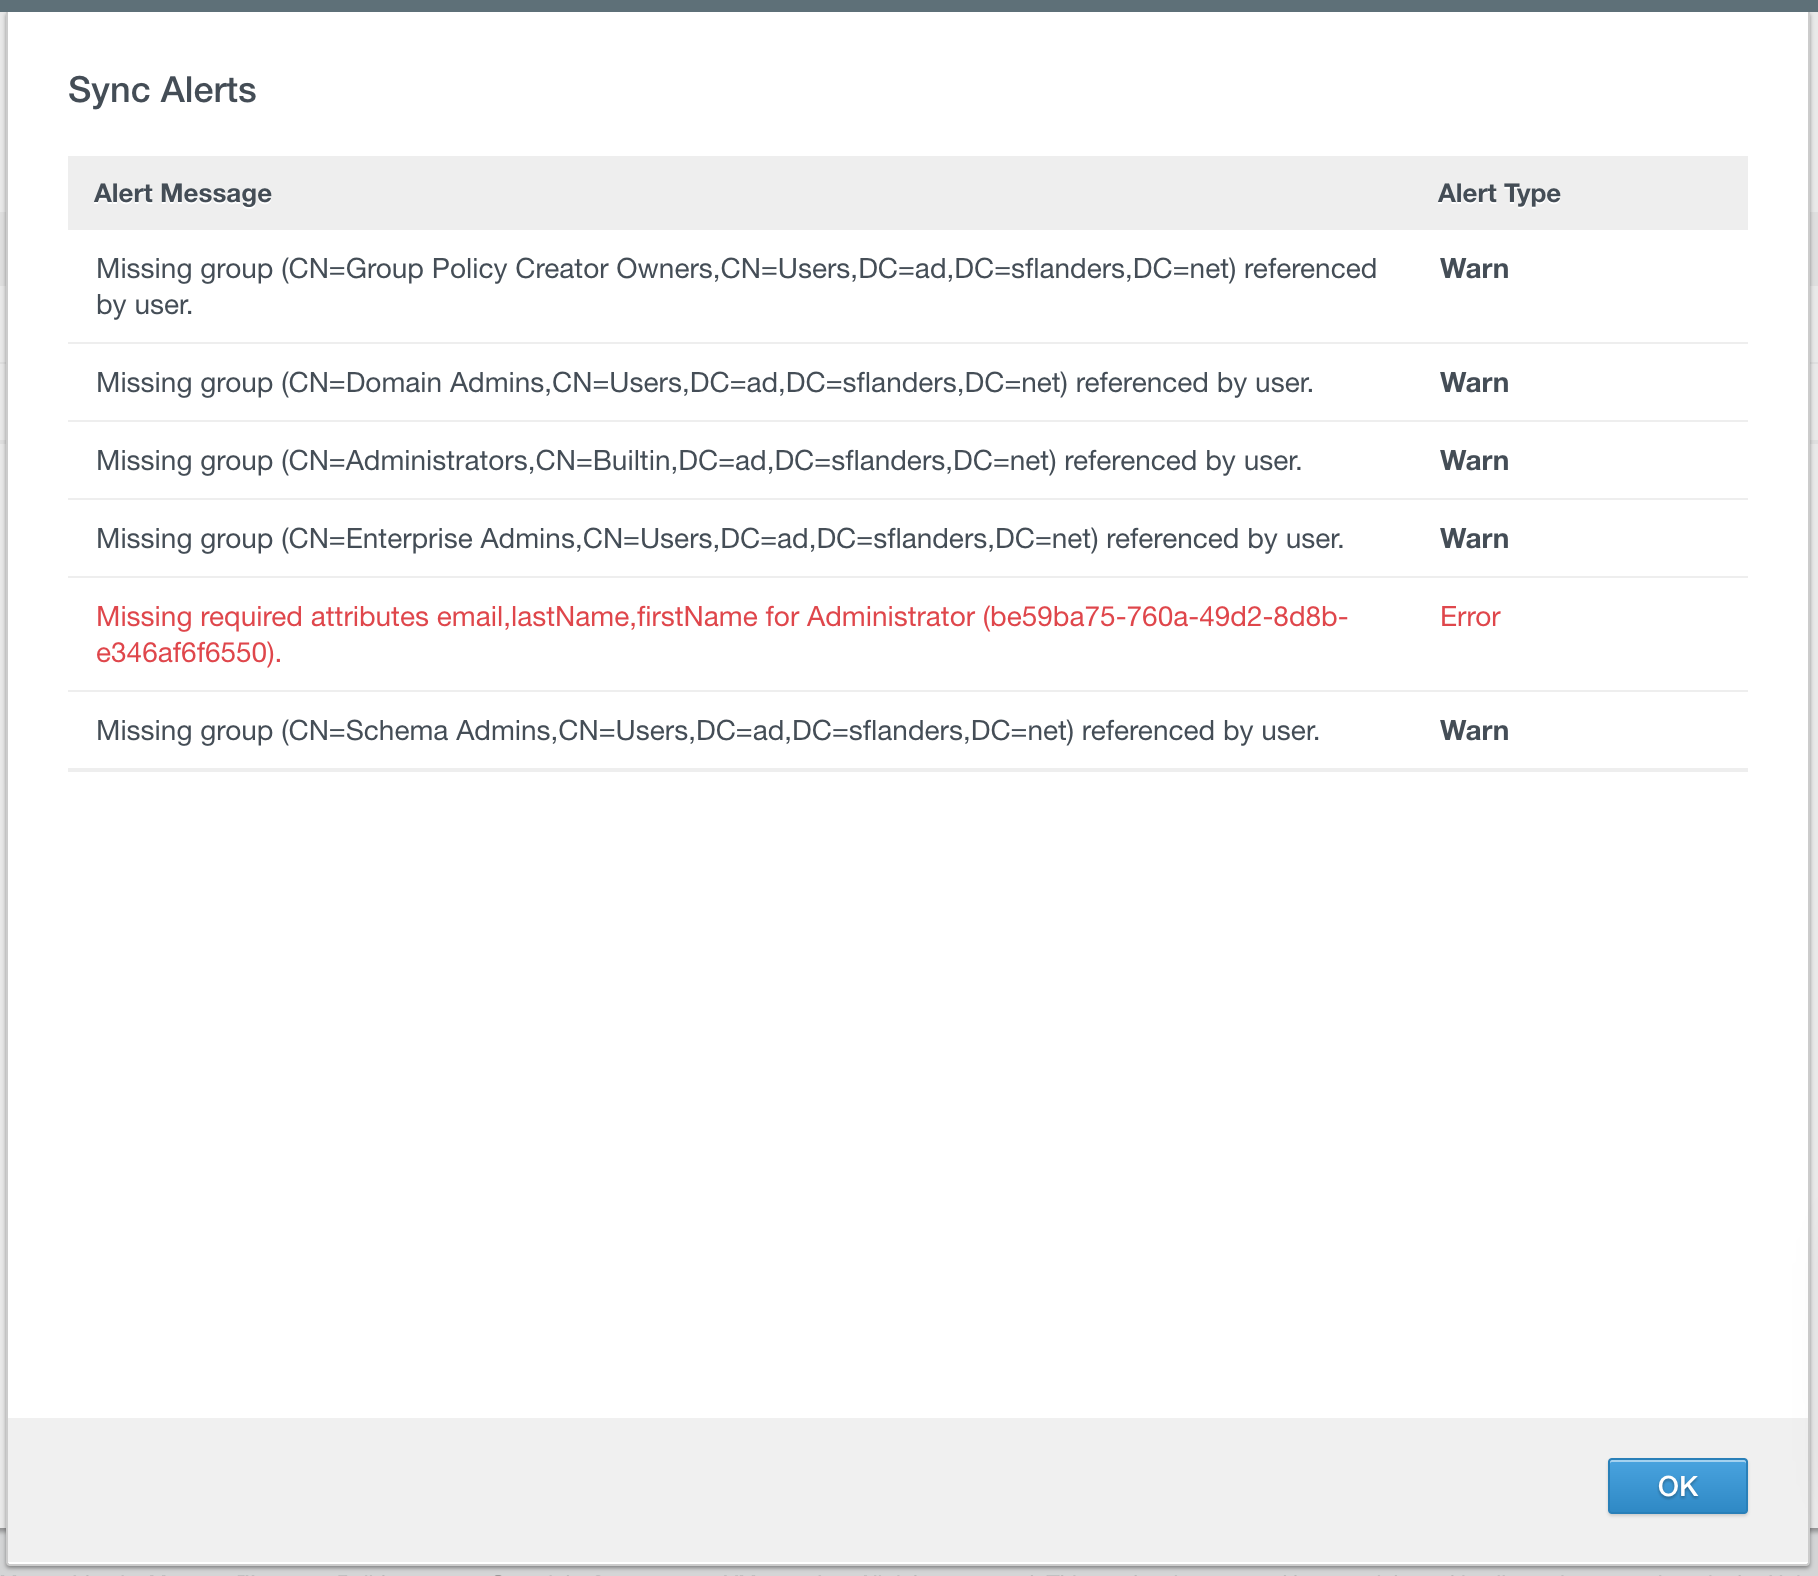
Be sure to address the alerts as they indicate problems you will experience. In my case, the user I attempted to sync did not have the email, lastName, and firstName attributes set. As a result, the user was not synced and I could not log in with them. I fixed this on AD, did another sync on VIDM and the error went away.
© 2017, Steve Flanders. All rights reserved.