Time machine is a great piece of backup software that comes with Macs. How Time Machine works is that it backs up based on a policy until there is no space left on the destination. When space is depleted, Time Machine deletes the oldest backups. While the process makes sense, it does raise the question of how to backup multiple Macs to the same Synology device. I will cover the process in this post.
UPDATE: As of DSM 6.1 Synology now allows multiple shared folders to be used with time machine. This post applies to DSM 6.0 or older.
Background
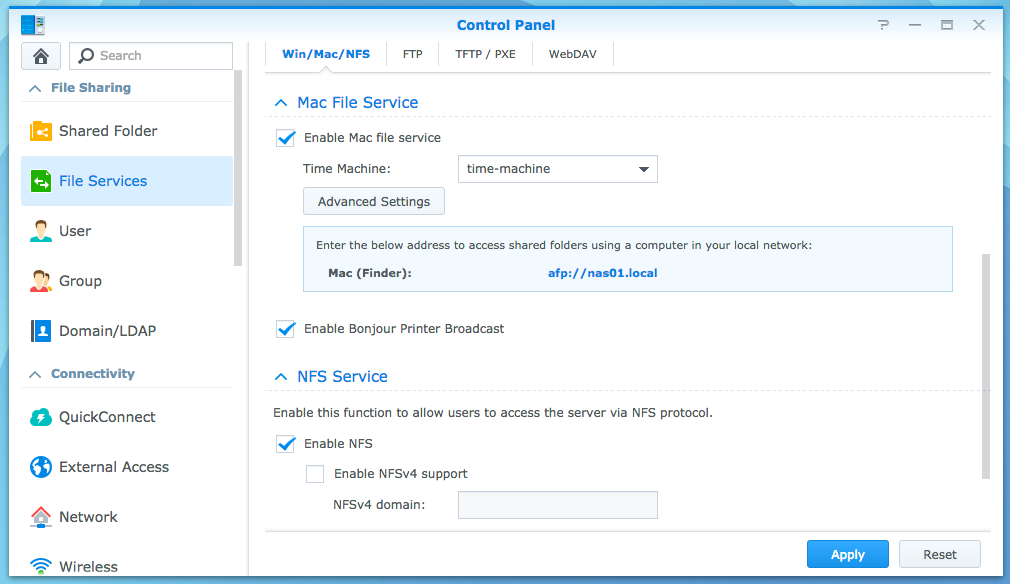
One of the many features that Synology supports is Apple’s Time Machine, which of course means that Mac File Service (AFS) is also supported. Once you create a folder, you can navigate to File Services, enable Mac file service and specify the Time Machine folder.
IMPORTANT: Synology supports a SINGLE Time Machine folder location — if you have multiple clients backing up to the same location this may seem problematic given that Time Machine uses ALL space available.
UPDATE: As of DSM 6.1 Synology now allows multiple shared folders to be used with time machine. This post applies to DSM 6.0 or older.
Initial Reaction
At first, you might be thinking the answer to the multiple Macs question is just to create folders on Synology with quotas. There are a couple problems with this approach. First, folders do not support quotas. When you first realize this you might be tempted to create dedicated volumes for each Time Machine backup, but then you run into the second problem being Synology only support a single Time Machine shared folder in Mac File Service. The good news is there is a way!
Better Solution
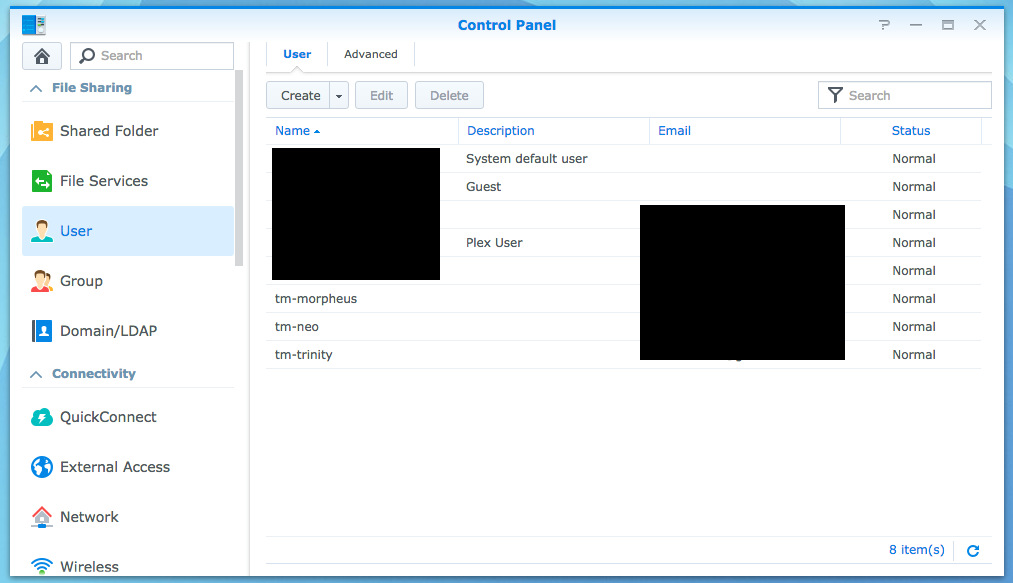
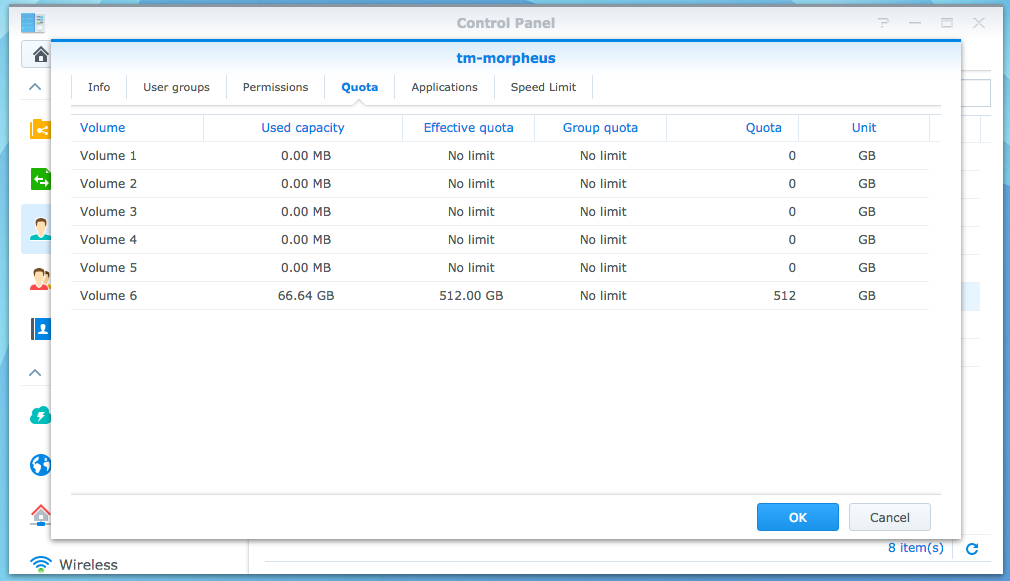
While folders cannot have quotas, it turns out that users can. As such, you can have a single folder shared by multiple users where each user has a fixed quota. Currently, I have three Macbook Pros that need to be backed up. As such, I created a 2 TB AFS share as well as three separate users based on the names of the Macbook Pros. For each user I assigned a quota based on the importance of the device. Then I simply configured Time Machine on each device to mount via the assigned users.
UPDATE: Since writing this post, Synology has posted a KB with the steps outlined below.
IMPORTANT: User quotas support a maximum of 4TB, if you need more then this approach will not work. In this case, your only option is to create a single large shared folder and not use quotas. Each Mac will have its own sparsebundle so the backups will not conflict, however the change rate of each Mac being backed up to the share dictates the amount of backups per system.
Here are my users:
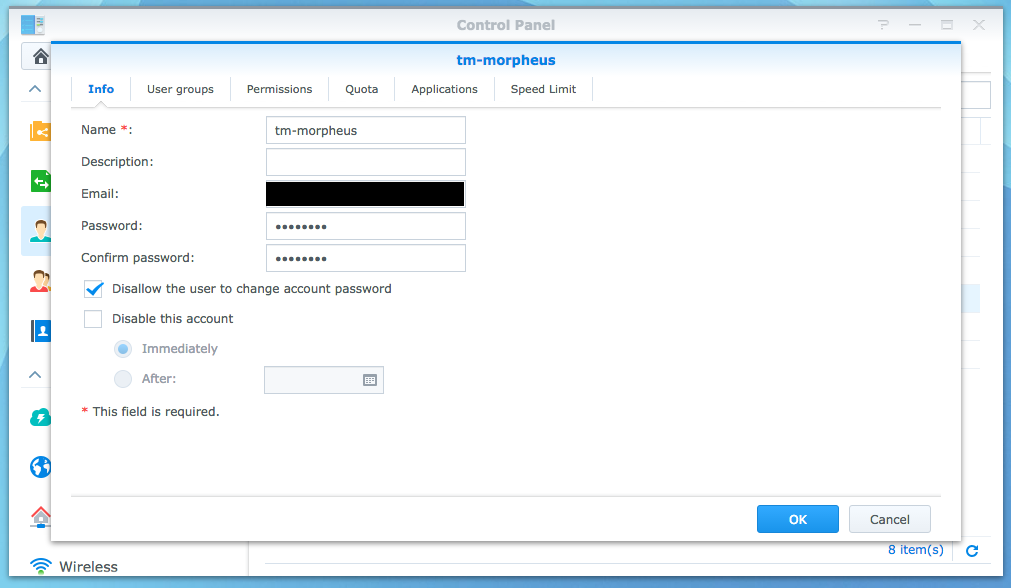
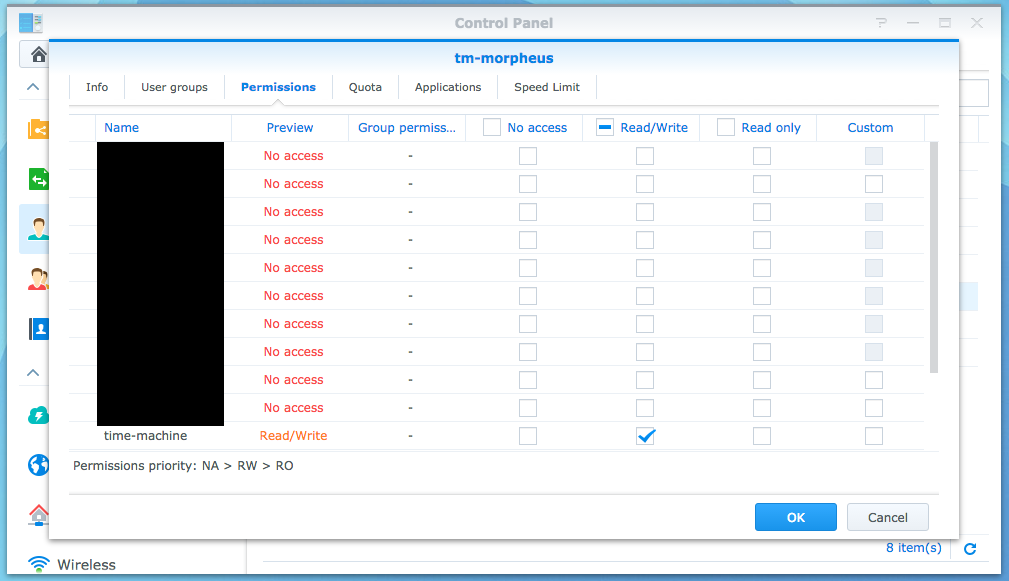
For each user I configured the follow options:
1.) Info
2.) Permissions
3.) Quota
Summary
Understanding how Time Machine works and the options available on Synology makes it possible to have the best backup experience especially when you have multiple systems you wish to backup. To limit space, dedicated users with specified quotas makes it possible to have a single share — which Synology requires for Mac file system + Time Machine — shared by multiple backup clients.
© 2015, Steve Flanders. All rights reserved.

Hey Steve- in the ‘initial reaction’ comments above you mention one might be tempted to create a dedicated volume for each time machine backup? Do you know how to do this? I have multiple macs that I need to backup using time machine – but each has >4TB. Since quotas are limited to 4tb, they won’t work for me.
Your thoughts on how to workaround (ideally create a separate volume for each TM backup) would be greatly appreciated.
Thanks.
Hey Jabe — Thanks for the comment! The initial reaction was to literally create a Volume at a fixed size with a single share folder per Mac this way the Volume is the quota instead of the shared folder. Unfortunately, the workaround will not work because Synology only lets you set a single Time Machine destination in Mac File Services. Long story short, there is no workaround here. The only thing I can think of is no quota and all share the same destination which sounds like would need to be a 12TB+ shared folder. I hope this helps!
Steve – perfect. thanks! That’s where I was coming out but needed the confirm. Do you know what happens when, say 2 Time Machine sparsebundles (1for each Mac), fill up the one 12TB shared folder? Do the sparsebundle files overwrite each other as they expand, or do they treat the volume as full and then just start deleting the oldest backups within the sparsebundle? I had heard that Time Machine on a synology doesn’t delete the oldest backups like it does on a Time Capsule – and instead gives an ‘out of space’ error.
I have had mixed experiences here — I have never seen ‘out of space’, I see it treated as full and old backups deleted. With that said, I have also experienced corrupted sparsebundle, which results in Time Machine needing to perform a a new full backup and losing all previous backups. Given your use-case of 4TB+ I think a separate solution from Synology might be advisable.
The images are not loading for some reason.
Hey Dan — Thanks for the comment! It appears to be related to the latest WP upgrade… I think most should be working now, but I will continue to investigate.
Thank you for this tutorial, Steve.
I am wondering how the Synology station counts the data. I set up time machine on the ds quite a while ago and I want to set the limit now. The problem is that I initially copied an existing time machine sparsebundle of about 400gb onto the ds and continued using it. There have been added about 100gb to it since then which appears in the used quota but the initial 400gb don’t. I believe those appear on another account that I used for copying the sparsebunde.
Would it help to change the owner of the sparse bundle folder to my time machine user? And is this save to do without damaging the bundle?
Or do you have another solution for my problem?
I hope you are able to help me. Thanks!
Hey Hugo — Thanks for the comment. Given quotas are based on users, yes changing the ownership of the 400gb sparebundle you copied over should allow it to be reflected under the user quota you expect. Be sure to the mac client on the other end sends as the new owner you are switching to. Changing the owner should not damage the bundle (since you can switch it back in worst case), however if you do not change the user on the mac client-side then the mac may report the sparebundle is corrupt (because it cannot read/write to it) and suggest starting over. I hope this helps!
Before I read your article I configured quite the same as you describe: 800GB quota on (single) user tm. The sparsebundle in folder ‘TimeMachineDrive’ has in the mean time grown to 1.5TB. It seems the quota limit is not in effect. There is only user ‘tm’ having any rights on the folder. I have only Volume1.
My volume is out of space now due to the ever growing sparsebundle.
I had some difficulties over time with my Mac seeing the folder on my network so there has been some to and fro before it worked robustly. Could it be that I have hidden bands in the sparsebundle that are not recognized by the Mac? If so how to check? Could it be that I already had a sparsebundle larger than 800GB when I set that limit?
Hey Peter — Thanks for the comment. It is possible you already have another sparesebundle in the directory. The easiest way to check this is to enable SSH to your Synology, SSH in and check the directory. If you see other folders consuming space, you can delete them from the CLI. I hope this helps!
Thanks for the easy walk through. Multi-user setup ought to be in Synology’s documentation.
Happy to help!
I don’t quite understand where you get “Synology supports a SINGLE Time Machine folder location” from, but this directly contradicts Synology’s own documentation about Time Machine backups, which instructs us to make a separate user and shared folder for every Mac’s backup:
https://www.synology.com/en-global/knowledgebase/DSM/tutorial/Backup_Restore/How_to_back_up_files_from_Mac_to_Synology_NAS_with_Time_Machine#t1.2
If your information is outdated it would be nice to mark it as such, in order not to confuse people.
Hey Konrad — Thanks for the comment. Synology does only support a single time machine folder location — you could of course create subdirectories in this folder location, but directories do not support quotas. This means if you wish to back up multiple devices then you need to create dedicated users with dedicated quotas else the backups may step on one another. In this post, I walked through the steps I attempted. As for the steps on how to create dedicated users and quotas, when I wrote this post back in 2015 the Synology KB you linked to did not exist — I will add a link to the KB.
Thanks for your answer. I guess what is confusing me is that the Synology article just advises to make a (any) folder for Time Machine, but they don’t specify if it’s possible to use multiple folders for Time Machine. You on the other hand are talking about as it seems some kind of ‘official’ Time Machine folder. Is this maybe because you are using this Mac File Service, and they are not? What does this service do? Thanks for your help!
They are using the Mac File Service as well. On the link you supplied, see section: “1.3 Set the shared folder as Time Machine’s backup target”. So you can create any shared folder, but only one shared folder can be associated with the Mac File Service Time Machine destination.
OK. Thanks again. Unfortunately, the ‘Mac File Service’ section no longer exists in the newest DSM version in the control panel -> file services, so your guide & the Synology one are both a bit outdated. Took a bit of guessing to get the right settings.
Ah, I just upgraded to DSM 6.1 and now I see what you mean — they now moved it and now allow you to select more than one directory. This is a great enhancement. I will blog about this soon and update this post.